利他才能利己


  • 首页

  • 标签

  • 归档

  • 搜索

Mac install Cocoapods

发表于 2016-11-08 | 分类于 MacOS |

声明

这篇博客原本被我发表在 CSDN .

那里不再更新, 现在在这里做持续更新.

导引

如果你的 Mac OSX 升级到 10.11.x+, 并且需要安装 Cocoapods, 可以参考本博客.

安装 ruby

Mac 系统自带了 ruby, 但是建议大家使用 Homebrew 安装 ruby.

因为 Cocoapods 升级需要对应的 ruby 版本也要升级, 使用 Homebrew 比较方便.

安装 ruby:

1
brew install ruby

查看当前安装的 ruby 版本:

1
ruby -v

会得到类似下面的信息:

1
ruby 2.3.1p112 (2016-04-26 revision 54768) [x86_64-darwin15]

gem 是管理 Ruby 库和程序的标准包.
安装了 ruby, 自带了 gem 工具.

可以使用 gem -v 查看 gem 版本.

安装 Cocoapods

1.移除原来的源, 不管以前是否安装过 Cocoapods.

1
gem sources --remove http://ruby.taobao.org/

2.重新添加源, 注意是 https.

1
gem sources -a https://gems.ruby-china.org/

之前 taobao 的源 好像已经不行了.

注意:添加源之前在浏览器打开 https://gems.ruby-china.org/ 这个地址看一看是否能访问,如果不能访问就修改一下为 https://gems.ruby-china.com 这个地址。

3.查看是否添加成功, 该步骤可选.

1
gem sources -l

安装, 使用 root 权限安装.

1
sudo gem install -n /usr/local/bin cocoapods

这种安装方式, 会安装最新的 release 版本.

你也可以使用下面两种方式来安装.

指定版本安装:

1
sudo gem install -n /usr/local/bin cocoapods -v 1.0.0

安装最新的 release beta 版本:

1
sudo gem install -n /usr/local/bin cocoapods --pre

卸载 Cocoapods

卸载 Cocoapods 只需执行:

1
sudo gem uninstall cocoapods

如果想删除本地的 pod repo, 可以这样:

1
rm -fr ~/.cocoapods/

建立本地 repo

安装完 Cocoapods 后, 需要建立本地的 repo.

1
pod setup

即使你现在不执行 pod setup, 后面进行 pod install 或者 pod update 的时候, 也会自动的进行 pod setup.

执行 pod setup 的目的是将所有第三方的 podspec 索引文件更新到本地的 ~/.cocoapods/repos 目录中.

安装使用中遇到的问题

问题1: 命令行执行 pod 发生: pod command not found, 但是 sudo pod 却可以执行.

解决方案即如下步骤:

[1].卸载原有的 Cocoapods

1
sudo gem uninstall cocoapods

[2].重新安装 Cocoapods

1
sudo gem install -n /usr/local/bin cocoapods

[3].赋予/usr/local/bin给予执行与读取权限:

1
sudo chmod -R +rx /usr/local/bin/

建议最好使用代(fanq)理(qiang).

问题2: 更新 gem 过程中, 遇到

1
Operation not permitted - /usr/bin/update_rubygems

可以通过通过 brew 安装 ruby 解决.

1
brew install ruby

问题3: pod setup 失败

失败提示信息类似:

1
2
3
4
5
Cloning into 'master'...
error: RPC failed; curl 56 SSLRead() return error -36
fatal: The remote end hung up unexpectedly
fatal: early EOF
fatal: index-pack failed

解决方案: 更新 gem

1
sudo gem update --system

问题4: 添加源, 提示如下问题

1
source https://gems.ruby-china.org/ already present in the cache

这个说明你已经添加过该源, 可以使用

1
gem sources -l

来查看已经添加的源.

常用操作

1.更新 gem

1
sudo gem update --system

2.pod repo update

更新本地仓库.

3.pod search xxx

搜索 cocoapods 项目.

4.pod list

列出所有可用的库.

5.pod install

根据 podfile 和 podfile.lock来安装库.

默认会执行 pod repo update.

可以加入参数 –no-repo-update 不执行 pod repo update.

6.pod update

更新已安装的库到最新版本, 并且创建新的 Podfile.lock 文件.

该命令也会默认会执行 pod repo update.

可以加入参数 –no-repo-update 不执行 pod repo update.

更新记录

2017-01-04 更新

升级 ruby 到 2.4 版本后, cocoapods 无法使用了.

升级的 ruby 版本信息:

1
ruby 2.4.0p0 (2016-12-24 revision 57164) [x86_64-darwin15]
1
2
3
4
5
使用任何 pod 命令都报错:

/usr/local/Cellar/ruby/2.4.0/lib/ruby/2.4.0/rubygems.rb:270:in `find_spec_for_exe': can't find gem cocoapods (>= 0.a) (Gem::GemNotFoundException)
from /usr/local/Cellar/ruby/2.4.0/lib/ruby/2.4.0/rubygems.rb:298:in `activate_bin_path'
from /usr/local/bin/pod:22:in `<main>'

查找各种解决方案, 最终还是没有解决.

你可以在 这里 下载 Cocoapods 的 Mac 版本 App 使用.


扫码关注,你我就各多一个朋友~

Cocoapods 问题集锦

发表于 2016-11-08 | 分类于 MacOS |

承诺

本文会持续更新, 分享在使用 cocoapods 过程中遇到的问题和解决方案.

欢迎大家补充.

安装问题

可以阅读博客 Mac 安装 Cocoapods.

pod search 问题

pod search 无法搜索到指定的项目

问题描述: 执行 pod search [Name], 出现类似下面的提示:

1
[!] Unable to find a pod with name, author, summary, or description matching `[Name]`

解决方案: 删除 search_index.json 文件

1
rm ~/Library/Caches/CocoaPods/search_index.json

然后, 重新执行:

1
pod search 项目名称

如果这样行不通的话, 可以这样:

1
2
3
rm -rf ~/.cocoapods
rm ~/Library/Caches/CocoaPods/search_index.json
pod setup

如果你的网络不好, 需要漫长的等待…

这个时候, 可以去抽半盒烟了. Orz…

pod setup 问题

pod setup 卡死

问题描述:

pod setup 会在本地建立 cocoapods 仓库.

在执行的过程中, 你可以在 ~/.cocoapods/repos 使用
du -sh * 来看 repos 目录的大小变化.

如果观察好久, 大小没有变化, 最终会出现类似下面的错误:

1
2
3
4
5
Cloning into 'master'...
error: RPC failed; curl 56 SSLRead() return error -36
fatal: The remote end hung up unexpectedly
fatal: early EOF
fatal: index-pack failed

解决方案,如下:

先更新 gem

1
sudo gem update --system

再重新执行

1
pod setup

pod install 问题

无法使用,报类似下面的两种错误信息:

1
can't find gem cocoapods (>= 0.a) with executable pod (Gem::GemNotFoundException)
1
2
While executing gem ... (TypeError) 
no implicit conversion of nil into String

解决方案,如下:

1. 重新安装 ruby

1
brew reinstall ruby

2. gem 更新

1
2
3
rm /usr/local/bin/update_rubygems

sudo gem update --system

3. 重新安装 Cocoapods 并重新添加源

1
2
3
4
5
sudo gem uninstall cocoapods

sudo gem install -n /usr/local/bin cocoapods

gem sources -a https://gems.ruby-china.org/

扫码关注,你我就各多一个朋友~

Cocoapods 管理开源项目

发表于 2016-11-01 | 分类于 iOS |

准备工作

在进行下面工作之前,请确保你做了下面三件事情:

1. 创建或者已经有了 github 账号.
2. 了解和熟悉如何在 github 上面创建 Repository.
3. MacOS 上面安装了 Cocoapods.

如果你还没有使用 Cocoapods, 建议看看 Mac OSX 10.11.1+ 安装 Cocoapods 这篇博客.

在博客 iOS 项目: 打造本地 pod 库 里面有介绍如何打造本地的 pod 库,不需要借助任何仓库就可以完成,操作简单,适合项目组内使用。

今天给大家分享如何将代码开源并放到 pod 库中,供别人使用。这种方式属于打造公共(Public repo)仓库, 任何人都可以搜索到你贡献的库并使用你的库。后面会跟大家分享如何打造私有(Private repo),敬请期待。

这篇博客是基于一个实际例子 MZInsetLabel 来说明的,期待与优秀的你交流讨论。

创建 Repository 并完善项目

1. 在 Github 上面创建 Repository,取名为 MZInsetLabel.

2. 将该工程 clone 到本地磁盘.

3. 写代码,这里我只写了 MZInsetLabel.h | .m 文件.

4. 创建 podspec 文件.

使用下面命令,即可产生该文件。

1
pod spec create MZInsetLabel

在当前目录会生成 MZInsetLabel.podspec 文件。按照文件规范和实际情况填写即可,如果不知道怎么填写,可以在 Github 上面找一个开源项目参考即可。

注意: Tag 版本号不要错误.

最终内容如下:

1
2
3
4
5
6
7
8
9
10
11
12
13
14
15
16
Pod::Spec.new do |s|
s.name = "MZInsetLabel"
s.version = "0.2.0"
s.summary = "MZInsetLabel is subClass of UILabel."
s.description = <<-DESC
MZInsetLabel is a sub class of UILabel that can be set insets.
DESC
s.homepage = "http://www.veryitman.com"
s.license = "MIT"
s.author = { "veryitman" => "veryitman@126.com" }
s.platform = :ios, "7.0"
s.source = { :git => "https://github.com/veryitman/MZInsetLabel.git", :tag => "#{s.version}" }
s.source_files = "*.{h,m}"
s.framework = "UIKit"
s.requires_arc = true
end

项目检测

检查该 podspec 文件,执行下面命令

1
pod lib lint MZInsetLabel.podspec

–verbose 可以输出更加详细的内容

1
pod lib lint MZInsetLabel.podspec --verbose

正确的话, 你可以看到下图如所示的内容:
1

在检测的过程中,如果有一些警告导致无法验证通过,可以使用 --allow-warnings 参数规避这些 warning,但我还是建议大家尽量将 warning 修改好。

1
pod lib lint --allow-warnings

pod lib lint *.podspec 是只从本地验证你的 pod 能否通过验证.

pod spec lint*..podspec 是从本地和远程验证你的 pod 能否通过验证.

大家可自行选择这两种方式。

添加项目到 Github Repository

将本地的代码 push 到 Github 的 Repository, 就是刚才创建的 MZInsetLabel.

1
2
3
4
5
git add `文件`或者`文件夹`

git commit -m "Init"

git push

在你的 Github Repository 上面创建一个 Release 作为 Tag(0.1.0版本),如图所示:
1

推送到 cocoapods

1. 注册 trunk

pod trunk register 你的邮箱 ‘用户名’ –description=’简单描述’

完整命令如下:

1
pod trunk register veryitman@126.com 'veryitman' --description='mark'

2. 打开邮箱, 激活邮件, 点击链接激活

3. 检查注册信息

执行命令如下:

1
pod trunk me

4.添加到 cocoapods

执行下面命令, 即可.

1
pod trunk push MZInsetLabel.podspec

成功的效果图:

1

1

验证使用

1. 检查是否可以搜索到

1
pod search MZInsetLabel

如果搜索不到, 请执行

1
pod setup

2. 在项目中可以使用该项目

1
pod 'MZInsetLabel', '~> 0.1.0'

然后在你的测试项目中,执行 pod install 即可。

可能遇到的麻烦

1. 执行 pod trunk push *.podspec 时, 好久没反应?

这种情况, 大多数都是因为你的网络不给力造成的, 如果你确定你的网络没问题, 那么请翻墙.

2. 执 行 pod trunk push *.podspec 时报错?

报错信息:

1
ERROR | [iOS] unknown: Encountered an unknown error (Simulator iPhone 4s is not available.) during validation.

这个错误是因为, 更新了 xcode8 之后不再支持 ios7 的缘故.

解决方案(我的), 升级 cocoapods.

1
sudo gem install -n /usr/local/bin cocoapods

3. pod trunk push 失败

失败提示信息类似:

1
2
3
4
5
Cloning into 'master'...
error: RPC failed; curl 56 SSLRead() return error -36
fatal: The remote end hung up unexpectedly
fatal: early EOF
fatal: index-pack failed

解决方案: 更新 gem

1
sudo gem update --system

Git 命令行操作

1. 向远程 Repository 添加 tag

1
2
3
git tag -m "注释" 0.0.1

git push --tags

执行后,可以看到 Github Repository 上会多一个对应的 tag 版本。

2.删除本地 Tag

1
git tag --delete [TagName]

如:

1
git tag --delete 0.0.1

3. 删除远程 Tag

1
git push --delete origin [TagName]

如:

1
git push --delete origin 0.0.1

在 Github 上面如果你不小心打错了 Release, 然后删除该 Release.
你会发现, tag 无法删除.使用上面方式妥妥的解决.

如果你删除 tag,想重新打一个相同的 tag,需要先删除本地的 tag,否则会失败。


扫码关注,你我就各多一个朋友~

iOS: 谈谈 frame 和 bounds

发表于 2016-10-22 | 分类于 iOS |

起因

大家知道, 我们可以设置 view 的四个角或者其中一个或者几个为圆角.

使用的方法:

1
2
3
+ (instancetype)bezierPathWithRoundedRect:(CGRect)rect 
byRoundingCorners:(UIRectCorner)corners
cornerRadii:(CGSize)cornerRadii;

拖好界面元素之后, 在代码中来修改其为圆角, 居然失败了.

想要的效果是这样的:
1

但是最终是这样的:
1

于是总结了一下, 分享给大家.

设置圆角

这里分两种情况.

第一种: 只放置控件, 不设置约束.

1.storyboard 中拖好控件.

注意: 这里我并没有设置任何约束.

2.vc 代码

1
2
3
4
5
6
7
8
9
10
11
12
13
14
15
16
17
18
19
20
21
22
23
24
25
26
27
@interface ViewController ()

@property (strong, nonatomic) IBOutlet UILabel *lb;

@end

@implementation ViewController

- (void)viewDidLoad
{
[super viewDidLoad];

[self changeLbCorner];
}

- (void)changeLbCorner
{
UIBezierPath *maskPath = [UIBezierPath bezierPathWithRoundedRect:self.lb.frame
byRoundingCorners:UIRectCornerTopRight|UIRectCornerBottomRight
cornerRadii:CGSizeMake(7, 7)];
CAShapeLayer *maskLayer = [[CAShapeLayer alloc] init];
maskLayer.frame = _lb.bounds;
maskLayer.path = maskPath.CGPath;
self.lb.layer.mask = maskLayer;
}

@end

代码编译运行到模拟器(iphone6), 看不到任何东西.

log 日志显示 lb 的信息如下:

1
2
3
[ViewController viewDidLoad]:
lb.bounds: {{0, 0}, {136, 39}}
lb.frame: {{39, 89}, {136, 39}}

位置信息是正确的, 咨询检查发现是参数传入错误, 修改 changeLbCorner 方法:

1
2
3
4
5
6
7
8
9
10
- (void)changeLbCorner
{
UIBezierPath *maskPath = [UIBezierPath bezierPathWithRoundedRect:self.lb.bounds
byRoundingCorners:UIRectCornerTopRight|UIRectCornerBottomRight
cornerRadii:CGSizeMake(7, 7)];
CAShapeLayer *maskLayer = [[CAShapeLayer alloc] init];
maskLayer.frame = _lb.bounds;
maskLayer.path = maskPath.CGPath;
self.lb.layer.mask = maskLayer;
}

这里只是将 self.lb.frame 改成了 self.lb.bounds.

再次运行可以看到效果:
1

第二种: 放置控件并设置约束.

1.设置 lb 距离父 view 左边和上边的约束.
2.运行上面的代码, 发现, lb 并没有被设置为圆角.
并且 lb 的宽度和高度变小了, 变成了文字的实际的宽高.
1

看 log:

1
2
3
[ViewController viewDidLoad]:
lb.bounds: {{0, 0}, {136, 39}}
lb.frame: {{39, 89}, {136, 39}}

其实这个时候, (从上面图中可以看出) 这里的信息是错误的.

正确的信息应该是这样的(在 viewDidAppear 中)打印信息:

1
2
3
[ViewController viewDidAppear]:
lb.bounds: {{0, 0}, {58.5, 19.5}}
lb.frame: {{39, 89}, {58.5, 19.5}}

于是, 将

1
[self changeLbCorner];

放到 viewDidAppear 中, 圆角就正常了.

接下来, 我们把 lb 的宽高(136*39)约束也加上.

看一下, viewDidLoad 和 viewDidAppear 方法中打印的信息:

1
2
3
4
5
6
[ViewController viewDidLoad]
lb.bounds: {{0, 0}, {1000, 1000}}
lb.frame: {{0, 0}, {1000, 1000}}
[ViewController viewDidAppear:]
lb.bounds: {{0, 0}, {136, 39}}
lb.frame: {{39, 89}, {136, 39}}

可以看出, viewDidLoad 中错的一塌糊涂.

这里也说明一个问题:

xib 或者 storyboard 中设置过约束(现实开发中, 基本都会设置约束)的组件, 在 viewDidLoad 中并没有完全 layout, 只是预加载了这些组件.
想获取组件如 frame 何 bounds 信息, 在 viewDidLoad 中是不合适甚至是错误的.

那么, 问题来了, 哪里合适哪里正确.

上面如果你认真看了, 在 viewDidAppear 中是可以正确获取的, 那么还有没有其他方法可以获取呢?

VC 生命周期函数

要回答上面的问题, 大家要知道 vc 的生命周期函数.

上面的例子, 可以看出: 当函数 ViewDidLoad 被调用的时候,IBQutlets 已经被连接,但View 还没有被加载出来,无法获取 frame 等信息.
可以在 viewDidLoad 中完成在 IB 中不能完成的 view 的自定义。

关于 loadView 和 viewDidLoad 在后面博客跟大家分享.

今天要说的是

1
viewDidLayoutSubviews

viewDidLayoutSubviews 在 VC 子视图位置或者尺寸 (position|size) 被改变的时候被调用.

直到 AutoLayout 已经完成工作的时候才会被确定,所以在执行完 AutoLayout 之后会调用此方法. 换句话说, view 的 frame 和 bounds 这个时候是正确可以获取的.

viewDidLayoutSubviews 这个方法在 viewDidAppear 之前被调用, 有可能会被调用多次.

即依赖 bounds 或者 frame 的操作,都应该放在viewDidLayoutSubviews 中,而不是 viewDidLoad 或 viewWillAppear 中.

改变后的代码如下:

1
2
3
4
5
6
7
8
9
10
11
12
13
14
15
16
17
18
19
20
21
22
23
24
25
26
27
28
29
30
31
32
33
34
35
36
37
38
39
40
41
42
43
44
45
46
47
48
49
50
51
52
53
54
55
56
57
58
59
60
61
62
63
64
65
66
#import "ViewController.h"

#define MZLog(fmt, ...) NSLog((@"%s\n" fmt), __FUNCTION__, ##__VA_ARGS__)
#define MZLogLbInfo \
MZLog(@"lb.bounds: %@ \nlb.frame: %@", NSStringFromCGRect(self.lb.bounds), NSStringFromCGRect(self.lb.frame))

@interface ViewController ()

@property (strong, nonatomic) IBOutlet UILabel *lb;
@property (strong, nonatomic) IBOutlet UILabel *displayedText;

@end

@implementation ViewController

- (void)viewDidLoad
{
[super viewDidLoad];

MZLogLbInfo;
}

- (void)viewWillAppear:(BOOL)animated
{
[super viewWillAppear:animated];

MZLogLbInfo;
}

- (void)viewWillLayoutSubviews
{
[super viewWillLayoutSubviews];

MZLogLbInfo;
}

- (void)viewDidLayoutSubviews
{
[super viewDidLayoutSubviews];

MZLogLbInfo;

[self changeLbCorner];
}

- (void)viewDidAppear:(BOOL)animated
{
[super viewDidAppear:animated];

MZLogLbInfo;
}

#pragma mark Callback.

- (void)changeLbCorner
{
UIBezierPath *maskPath = [UIBezierPath bezierPathWithRoundedRect:self.lb.bounds
byRoundingCorners:UIRectCornerTopRight|UIRectCornerBottomRight
cornerRadii:CGSizeMake(7, 7)];
CAShapeLayer *maskLayer = [[CAShapeLayer alloc] init];
maskLayer.frame = _lb.bounds;
maskLayer.path = maskPath.CGPath;
self.lb.layer.mask = maskLayer;
}

@end

打印的 log 如下:

1
2
3
4
5
6
7
8
9
10
11
12
13
14
15
16
17
18
19
20
21
[ViewController viewDidLoad]
lb.bounds: {{0, 0}, {1000, 1000}}
lb.frame: {{0, 0}, {1000, 1000}}
[ViewController viewWillAppear:]
lb.bounds: {{0, 0}, {1000, 1000}}
lb.frame: {{0, 0}, {1000, 1000}}
[ViewController viewWillLayoutSubviews]
lb.bounds: {{0, 0}, {1000, 1000}}
lb.frame: {{0, 0}, {1000, 1000}}
[ViewController viewDidLayoutSubviews]
lb.bounds: {{0, 0}, {136, 39}}
lb.frame: {{39, 89}, {136, 39}}
[ViewController viewWillLayoutSubviews]
lb.bounds: {{0, 0}, {136, 39}}
lb.frame: {{39, 89}, {136, 39}}
[ViewController viewDidLayoutSubviews]
lb.bounds: {{0, 0}, {136, 39}}
lb.frame: {{39, 89}, {136, 39}}
[ViewController viewDidAppear:]
lb.bounds: {{0, 0}, {136, 39}}
lb.frame: {{39, 89}, {136, 39}}

frame 和 bounds

上面的例子, 大家看到由于传入了 frame 而不是 bounds 造成设置圆角失败.

下面说说 frame 和 bounds.

概念

从网上”偷”过来的图

1

1.frame

该 view 在父 view 坐标系统中的位置和大小(参照点是,父坐标系统).

2.bounds

该 view 在本地坐标系统中的位置和大小(参照点是,本地坐标系统,就相当于 view 自己的坐标系统,以(0,0)点为起点).
其实本地坐标系统的关键就是要知道的它的原点(0,0).

bounds 默认值是(0, 0, width, height).除非手动改变 bounds 的值.

单纯的从概念上面, 很难理解二者的区别.

提供一个例子, 例子大概是这样的:
redView 是 yellowView 的父视图, yellowView 是 blueView 的父视图.

通过改变 redView 的 bounds 会影响子视图的位置(不是frame).
将 redView 的 bounds 起点设为(-20, -20), 子视图相对于 redView 的本地坐标(0, 0), 也就需要往下增加20, 这样, yellowView 就往下移动了.

效果图:

1

1

1

完整代码

1
2
3
4
5
6
7
8
9
10
11
12
13
14
15
16
17
18
19
20
21
22
23
24
25
26
27
28
29
30
31
32
33
34
35
36
37
38
39
40
41
42
43
44
45
46
47
48
49
50
51
52
53
54
55
56
57
58
59
60
61
62
63
64
65
66
67
68
69
70
71
72
73
74
75
76
77
78
79
80
81
82
83
84
85
86
87
88
89
90
91
92
93
94
95
96
97
98
99
100
101
102
103
104
105
106
107
108
109
110
111
112
113
114
115
116
117
118
119
120
121
122
123
124
125
126
127
128
129
130
131
132
133
134
135
136
137
138
139
140
141
142
143
#import "ViewController.h"

#define MZLog(fmt, ...) NSLog((@"%s\n" fmt), __FUNCTION__, ##__VA_ARGS__)
#define MZLogLbInfo \
MZLog(@"lb.bounds: %@ \nlb.frame: %@", NSStringFromCGRect(self.lb.bounds), NSStringFromCGRect(self.lb.frame))

@interface ViewController ()

@property (strong, nonatomic) IBOutlet UILabel *lb;
@property (strong, nonatomic) IBOutlet UILabel *displayedText;

@end

@implementation ViewController
{
UIView *redView;
UIView *yellowView;
UIView *blueView;
}

- (void)viewDidLoad
{
[super viewDidLoad];

MZLogLbInfo;


// 将 redView 添加到 self.view
{
redView = [[UIView alloc] initWithFrame:CGRectMake(100, 200, 120, 120)];
redView.backgroundColor = [UIColor redColor];
[self.view addSubview:redView];
}

// 将 yellowView 添加到 redView
{
yellowView = [[UIView alloc] initWithFrame:CGRectMake(0, 0, 90, 90)];
yellowView.backgroundColor = [UIColor yellowColor];
[redView addSubview:yellowView];
}

// 将 blueView 添加到 yellowView
{
blueView = [[UIView alloc] initWithFrame:CGRectMake(0, 0, 60, 60)];
blueView.backgroundColor = [UIColor blueColor];
[yellowView addSubview:blueView];
}

[self logViewInfo];
}

- (void)viewWillAppear:(BOOL)animated
{
[super viewWillAppear:animated];

MZLogLbInfo;
}

- (void)viewWillLayoutSubviews
{
[super viewWillLayoutSubviews];

MZLogLbInfo;
}

- (void)viewDidLayoutSubviews
{
[super viewDidLayoutSubviews];

MZLogLbInfo;

[self changeLbCorner];
}

- (void)viewDidAppear:(BOOL)animated
{
[super viewDidAppear:animated];

MZLogLbInfo;
}

#pragma mark Callback.

- (void)changeLbCorner
{
UIBezierPath *maskPath = [UIBezierPath bezierPathWithRoundedRect:self.lb.bounds
byRoundingCorners:UIRectCornerTopRight|UIRectCornerBottomRight
cornerRadii:CGSizeMake(7, 7)];
CAShapeLayer *maskLayer = [[CAShapeLayer alloc] init];
maskLayer.frame = _lb.bounds;
maskLayer.path = maskPath.CGPath;
self.lb.layer.mask = maskLayer;
}

- (IBAction)doResetAction:(id)sender
{
[UIView animateWithDuration:1.0f animations:^{
[redView setBounds:CGRectMake(0, 0, 120, 120)];
[yellowView setBounds:CGRectMake(0, 0, 90, 90)];
} completion:^(BOOL finished) {
[self logViewInfo];
}];
}

- (IBAction)doChangeRedViewBounds:(id)sender
{
[UIView animateWithDuration:1.0f animations:^{
[redView setBounds:CGRectMake(-20, -20, 120, 120)];
} completion:^(BOOL finished) {
[self logViewInfo];
}];
}

- (IBAction)doChangeYellowViewBounds:(id)sender
{
[UIView animateWithDuration:1.0f animations:^{
[yellowView setBounds:CGRectMake(-20, -20, 90, 90)];
} completion:^(BOOL finished) {
[self logViewInfo];
}];
}

#pragma mark Display Debug Info.

- (void)logViewInfo
{
NSString *log4rView = [NSString stringWithFormat:@"RedView\nframe:%@ \nbounds:%@",
NSStringFromCGRect(redView.frame), NSStringFromCGRect(redView.bounds)];
NSString *log4yView = [NSString stringWithFormat:@"YellowView\nframe:%@ \nbounds:%@",
NSStringFromCGRect(yellowView.frame), NSStringFromCGRect(yellowView.bounds)];
NSString *log4bView = [NSString stringWithFormat:@"BlueView\nframe:%@ \nbounds:%@",
NSStringFromCGRect(blueView.frame), NSStringFromCGRect(blueView.bounds)];

NSString *log = [NSString stringWithFormat:@"%@\n%@\n%@", log4rView, log4yView, log4bView];
[self display:log];
}

- (void)display:(NSString *)content
{
self.displayedText.text = content;
}

@end

总结

  • frame, 描述的是当前视图在其父视图中的位置和大小.
    bounds, 描述的是当前视图在其自身坐标系统中的位置和大小.

所以, bounds 默认是 (0, 0, frame.size.width, frame.size.height)

另外, 还有一个 center 描述的是当前视图的中心点在其父视图中的位置.

  • bounds 和 frame 是两个不等同的概念, 改变 bounds 会影响子视图的位置(人眼看到其改变了位置), 设置 bounds 可以修改自己坐标系的原点位置. 但是不会改变子视图的 bounds 和 frame.

明白上面的道理很重要, iOS 中滚动视图能让你看到其中的内容, 正是利用了 contentoffset 和 bounds 属性.

这里以 tableView 为例子, 当我们向上滚动 tableView, tableView 的 contentOffset 和 bounds 的坐标都是正数, 相当于其本地坐标(0, 0)改变了即增加了(坐标系往下为增加), 那么其子视图就会向上去.

向下滑动时, 也是同一个道理.
可以通过运行 完整 Demo 中[查看 TableView]按钮来打开例子, 看日志.

  • 改变子视图所有父视图的 bounds, 子视图的位置是累加改变的.
    如上面改变 redView 和 yellowView 的 bounds, blueView 的位置相对 redView 往下移动了 40.

  • 当同一个视图的 bounds 大于 frame, 会导致 frame 被撑大,frame 的 x, y, width, height 都会被改变. 反之, bounds 小于 frame, frame 也会变小.

附录

  1. GitHub 上面可以下载 完整 Demo

  2. 推荐之前写在 CSDN 上的博文: iOS UI 技巧: 视图无法被点击

可关注我的微信公众号:
1

RN: 模拟 Mobx

发表于 2016-10-11 | 分类于 ReactNative |

前言

看过 [React Native 使用 Mobx] 这篇博客的同学, 对 Mobx 应该有了一个简单直观的认识.

其实, 我们完全可以使用 RN 中的 State 来达到同样的效果.

今天的主要内容是使用 State 来模拟 Mobx, 也算是对 Mobx 的进一步认识.

效果

实现效果和 [React Native 使用 Mobx] 中的效果一致, 只是代码没有使用 Mobx 框架.

实现

LegacyCounter.js

Add 和 Minus 两个按钮分别触发各自的回调, 来更新 state.
使用 state 的变化来到达更新 View (计数的 Text 会相应的做出变化)的目的.

1
2
3
4
5
6
7
8
9
10
11
12
13
14
15
16
17
18
19
20
21
22
23
24
25
26
27
28
29
30
31
32
33
34
35
36
37
38
39
40
41
42
43
44
45
46
47
48
49
50
51
52
53
54
55
56
57
58
59
60
61
62
63
64
65
66
67
68
69
/**
* 模拟 Mobx 在 ReactNative 上的一个小例子.
*
* state -> view
*/
'use strict';
import React, { Component } from 'react';
import {
StyleSheet,
View,
Text,
TouchableHighlight
} from 'react-native';
class LegacyCounter extends Component {
//构造方法
constructor(props) {
super(props);

this.state = {
//计数
counter: 0
};
}
render () {
return (
<View style = {styles.container}>
{/*加一*/}
<TouchableHighlight
onPress = {() => {this.setState({
counter: ++this.state.counter
})}}>
<Text>Add</Text>
</TouchableHighlight>
{/* 显示处理结果 */}
<Text style = {styles.resultTxtStyle}>
{this.state.counter}
</Text>
{/*减一*/}
<TouchableHighlight
onPress = {() => {this.setState({
counter: --this.state.counter
})}}>
<Text>Minus</Text>
</TouchableHighlight>
</View>
);
}
}
export default class LegacyComponent extends Component {
render () {
return (
<View style = {{flex: 1, marginTop: 64}}>

<LegacyCounter/>
</View>
);
}
}
/* 样式定义 */
const styles = StyleSheet.create({
container: {
flexDirection: 'row',
justifyContent: 'space-around'
},
resultTxtStyle: {
fontSize: 22,
color: 'red'
}
});

index.ios.js

这个文件很简单, 只是调用 LegacyCounter 中的组件.

1
2
3
4
5
6
7
8
9
10
11
12
13
14
import React, { Component } from 'react';
//引入自定义模块
import LegacyComponent from './js/Mobx/LegacyCounter'
import {
AppRegistry
} from 'react-native';
class RNMobxDemo extends Component {
render() {
return(
<LegacyComponent/>
);
}
}
AppRegistry.registerComponent('RNMobxDemo', () => MZRNTutorial);

后记

如果你想了解更多关于 RN 中 State 的知识, 请移步官方文档查阅 State 的用法.

后续会给大家带来更多关于 RN 这些方面的东西.

RN: 使用 Mobx

发表于 2016-10-06 | 分类于 ReactNative |

来由

在 JSFiddler 上面看到 React 结合 Mobx 的一个小例子.

爱不释手, 遂拿来改造一下, 让其能在 RN 上面一展雄风.

之前听过 Mobx, 说是要替代 Redux, 反正我是不知道这些东东, 第一次听说没有什么感觉!
如今又再次偶遇 Mobx, 决定认真学习一下它.

Mobx 简介

Mobx 的 github 地址.
目前关于他和 React Native 的(中文)资料不多, 大多数是关于 React 的.

看来想学好 React Native, 还是要做好 React 的功课呀!

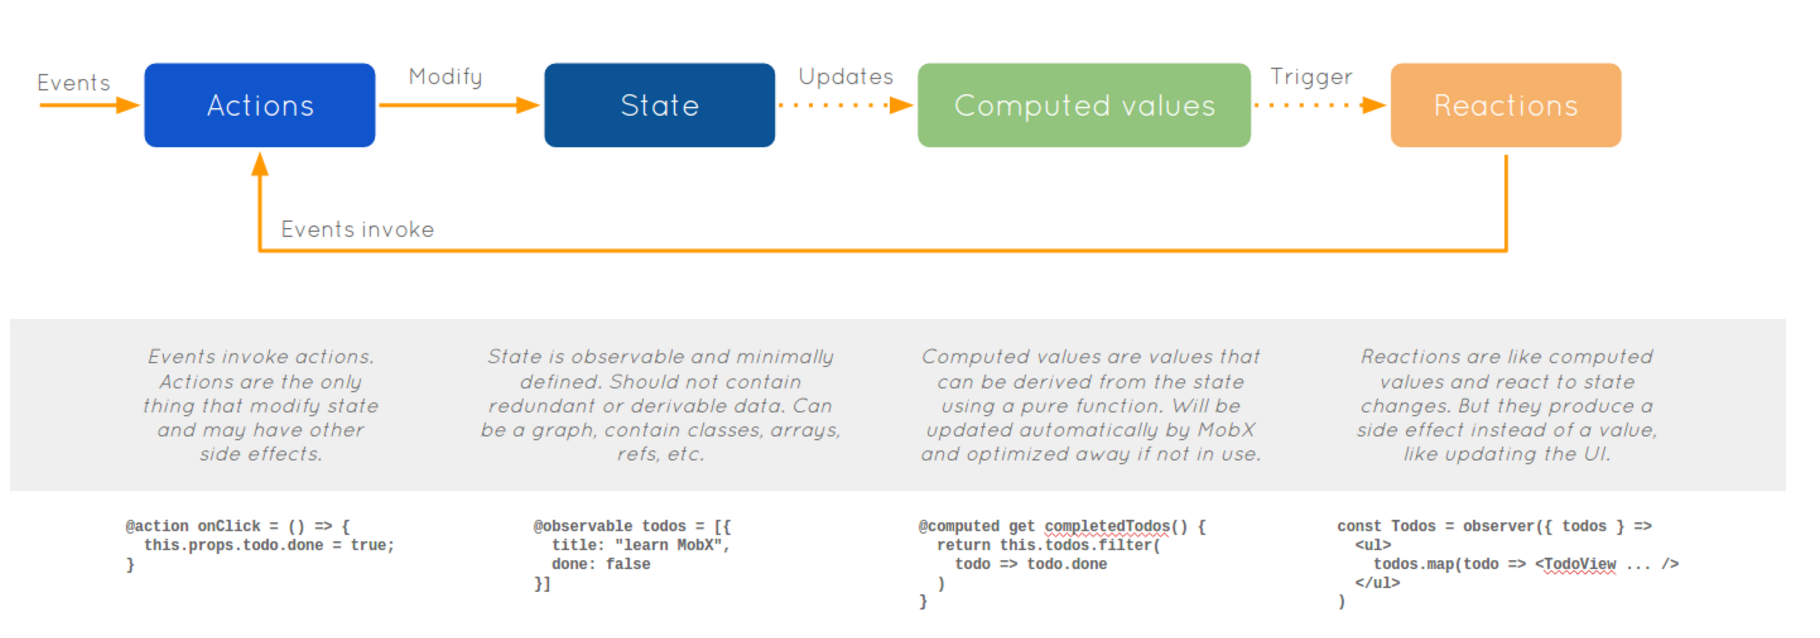
官网给了一个 Mobx 的图:
1

我也是刚接触这个「牛逼闪闪」的 Mobx, 共勉!

效果图

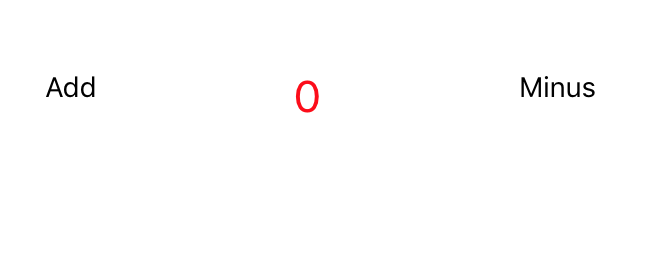
今天的例子很简单, 效果图如下
1

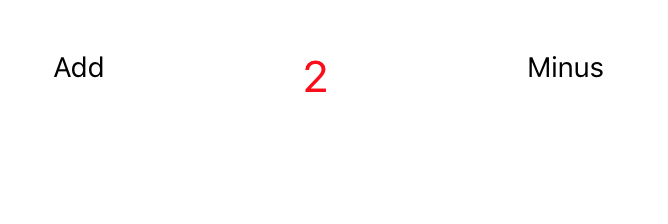
点击 Add
1

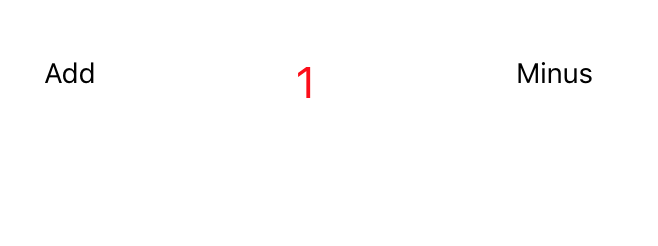
点击 Minus
1

下面具体说说如何搞定这个 Demo.

准备「材料」

这里假设你已经具备 React Native 的基本开发环境, 至少成功运行过一次 React Native 的程序.

1.创建 React Native 项目

1
react-native init RNMobxDemo

你也可以给你的工程取一个你喜欢的名字.
这里姑且称之为 RNMobxDemo

2.安装 mobx 和 mobx-react

1
npm i mobx mobx-react --save

3.Counter.js

该文件使用了 mobx 和 mobx-react 的组件.

具体代码:

1
2
3
4
5
6
7
8
9
10
11
12
13
14
15
16
17
18
19
20
21
22
23
24
25
26
27
28
29
30
31
32
33
34
35
36
37
38
39
40
41
42
43
44
45
46
47
48
49
50
51
52
53
54
55
56
57
58
59
60
61
62
63
64
65
66
67
68
'use strict';
import React, { Component } from 'react';
import {
StyleSheet,
View,
Text,
TouchableHighlight
} from 'react-native';
import { observer } from 'mobx-react/native';
import { observable } from 'mobx';
// 被观察者, 观察 counter 变量
const storer = observable({
counter: 0
});
//---------------------------------
// ES6 写法: Arrow Function
//---------------------------------
storer.plus = () => {
storer.counter ++;
};
storer.minus = () => {
storer.counter --;
};
class Counter extends Component {
render () {
return (
<View style = {styles.container}>
{/*加一*/}
<TouchableHighlight
onPress = {() => {this.props.store.plus()}}>
<Text>Add</Text>
</TouchableHighlight>
{/* 显示处理结果 */}
<Text style = {styles.resultTxtStyle}>
{this.props.store.counter}
</Text>
{/*减一*/}
<TouchableHighlight
onPress = {() => {storer.minus()}}>
<Text>Minus</Text>
</TouchableHighlight>
</View>
);
}
}
// 使用 observer 创建
const CounterComponent = observer(Counter);
export default class ReactionsComponent extends Component {
render () {
return (
<View style = {{flex: 1, marginTop: 64}}>

<CounterComponent store = {storer} />
</View>
);
}
}
/* 样式定义 */
const styles = StyleSheet.create({
container: {
flexDirection: 'row',
justifyContent: 'space-around'
},
resultTxtStyle: {
fontSize: 22,
color: 'red'
}
});

4.index.ios.js

该文件使用自定义的组件 ReactionsComponent

具体代码如下:

1
2
3
4
5
6
7
8
9
10
11
12
13
14
import React, { Component } from 'react';
//引入自定义模块
import ReactionsComponent from './js/Mobx/Counter'
import {
AppRegistry
} from 'react-native';
class RNMobxDemo extends Component {
render() {
return(
<ReactionsComponent/>
);
}
}
AppRegistry.registerComponent('RNMobxDemo', () => MZRNTutorial);

Mobx 支持「注解」.

这里的注解就是 ES7 中的 decorators (装饰者模式).

下面代码是使用注解的方式来声明, 但是你需要安装相关的插件(babel plugin)来支持.

安装该插件很简单, 在项目根目录按照下面步骤即可:

Step 1: 创建 .babelrc 文件

1
touch .babelrc

Step 2: 编辑 .babelrc 文件

1
2
3
4
{
'presets': ['react-native'],
'plugins': ['transform-decorators-legacy']
}

Step 3: 安装插件

1
npm i babel-plugin-transform-decorators-legacy babel-preset-react-native-stage-0 --save-dev

修改「Counter.js」, 代码如下:

1
2
3
4
5
6
7
8
9
10
11
12
13
14
15
16
17
18
19
20
21
22
23
24
25
26
27
28
29
30
31
32
33
34
35
36
37
38
39
40
41
42
43
44
45
46
47
48
49
50
51
52
53
54
55
56
57
58
59
60
61
62
63
64
65
66
67
'use strict';
import React, { Component } from 'react';
import {
StyleSheet,
View,
Text,
TouchableHighlight
} from 'react-native';
import { observer } from 'mobx-react/native';
import { observable } from 'mobx';
// 被观察者, 观察 counter 变量
const storer = observable({
counter: 0
});
//---------------------------------
// ES6 写法: Arrow Function
//---------------------------------
storer.plus = () => {
storer.counter ++;
};
storer.minus = () => {
storer.counter --;
};
@observer //使用@方式来前置声明
class Counter extends Component {
render () {
return (
<View style = {styles.container}>
{/*加一*/}
<TouchableHighlight
onPress = {() => {this.props.store.plus()}}>
<Text>Add</Text>
</TouchableHighlight>
{/* 显示处理结果 */}
<Text style = {styles.resultTxtStyle}>
{this.props.store.counter}
</Text>
{/*减一*/}
<TouchableHighlight
onPress = {() => {storer.minus()}}>
<Text>Minus</Text>
</TouchableHighlight>
</View>
);
}
}
export default class ReactionsComponent extends Component {
render () {
return (
<View style = {{flex: 1, marginTop: 64}}>

<Counter store = {storer} />
</View>
);
}
}
/* 样式定义 */
const styles = StyleSheet.create({
container: {
flexDirection: 'row',
justifyContent: 'space-around'
},
resultTxtStyle: {
fontSize: 22,
color: 'red'
}
});

从例子可以看出, storer 相当于 state, 当 state 发生改变了, 视图 View 也跟着变化.
也就是状态驱动.

Android 开发的同学应该知道 Adapter 和 notifyDatasetChanged 的机制, 当数据源发生变化的时候, 可以通知视图进行刷新操作.

这里的 Mobx 也可以这么简单的理解.

Mobx 的强大之处还有很多, 需要慢慢学习和挖掘.

RN: 0.34 运行在 Android 的问题

发表于 2016-09-26 | 分类于 ReactNative |

今天闲来无事, 想使用 RN 工程在 Android 设备上面跑跑.

想看看运行效果怎么样?!

适合读者

  • 有 Android 开发基础.
  • 会使用 Android Studio.
  • 初级 React Native 的开发者.

开发环境和工具

  • Android Studio 2.2
  • ReactNative 0.34
  • Android 模拟器
  • Mac 操作系统

预期效果

不出所料, 真的不能一帆风顺的 Run.

在我的博客 ReactNative: 不一样的 HelloWorld 中展示了 RN 在 iOS 上面的运行情况.

今天还是这个例子, 部署和运行到 Android 上面.

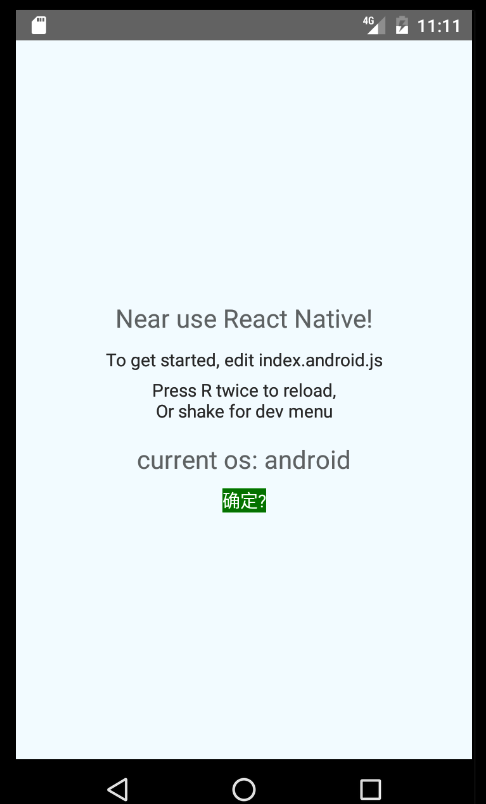
效果如下:
1

在这个过程中, 遇到几个问题.

特此记录.

问题描述和解决

问题1: 直接运行 crash

log 描述(部分)

E/AndroidRuntime: FATAL EXCEPTION: main
Process: com.mzrntutorial, PID: 5849
java.lang.RuntimeException:
Unable to start activity ComponentInfo{com.mzrntutorial/com.mzrntutorial.MainActivity}: java.lang.ClassCastException: android.app.Application cannot be cast to com.facebook.react.ReactApplication
at android.app.ActivityThread.performLaunchActivity(ActivityThread.java:2416)
at android.app.ActivityThread.handleLaunchActivity(ActivityThread.java:2476)

解决方案:

Manifest.xml 配置 Application 名称

android:name=”.MainApplication”

问题2:

1
could not get batchedbridge make sure your bundle is packaged correctly

解决问题1后, 再次运行, 会报问题2.
该问题是因为没有启动本地的 server.

使用 Xcode 可以自动运行本地 server.
可以参考博客 React Native 如何启动 local server

解决方案:

手动启动 server.

cd 项目根目录

1
react-native start

问题3:

模拟器没有 menu 按键, 无法 Reload

这个其实不是什么大问题, 但是对于初学者, 也算是一个问题.

新版的 Android SDK 创建的模拟器没有 menu 按键了

解决方案:

连续按两次字母 r 即可刷新.

这些问题, FB 后面肯定会解决的.
阿门!

附录(代码)

index.ios.js

1
2
3
4
5
6
7
8
9
10
11
12
13
14
15
16
17
18
19
20
21
22
23
24
25
26
27
28
29
30
31
32
33
34
35
36
37
38
39
40
41
42
43
44
45
46
47
48
49
50
51
52
53
54
55
56
57
58
59
60
61
62
63
64
65
66
67
68
69
70
71
72
73
74
75
76
77
78
79
80
81
82
83
84
85
86
87
88
89
90
91
92
93
import React, { Component } from 'react';
import {getPlatformString, isIOS} from './js/Generals/Utils/IDSRNPlatformUtil';
import MZButton from './js/ReactUIKit/MZButton'
import {
AppRegistry,
StyleSheet,
Text,
View,
Platform,
TouchableOpacity,
TouchableHighlight
} from 'react-native';
// 调用其他模块方法
var os = getPlatformString();
var iosPlatform = isIOS();//when run on 'ios' true
class MZRNTutorial extends Component {
constructor(props)
{
super(props);
this.state = {status:1};
}
customPressHandler = () => {
alert('当前状态: ' + this.state.status);
this.state.status = 2;
}
render() {
console.log('render ...');
return (
<View style={styles.container}>
<Text style={styles.welcome}>
Near use React Native!
</Text>
<Text style={styles.instructions}>
To get started, edit index.android.js
</Text>
<Text style={styles.instructions}>
Press 'R' twice to reload,{'\n'}
or shake for dev menu
</Text>
{/* 显示当前平台信息*/}
<Text style={styles.welcome}>
current os: {Platform.OS}
</Text>
{/*
<TouchableOpacity
style={styles.button}
onPress={this.customPressHandler}
>
<Text style={styles.buttonText}>确定</Text>
</TouchableOpacity>
*/}
<MZButton text="确定?" bgColor="green" dianjishijian={()=>{alert('居然点击确定?!')}}>
</MZButton>
</View>
);
}
}
const styles = StyleSheet.create({
button: {
height: 40,
width: 150,
borderRadius: 20,
justifyContent: 'center',
backgroundColor: 'green',
overflow: 'hidden'
},
buttonText: {
textAlign: 'center',
color: 'white'
},
container: {
flex: 1,
justifyContent: 'center',
alignItems: 'center',
backgroundColor: '#F5FCFF',
},
welcome: {
fontSize: 20,
textAlign: 'center',
margin: 10,
},
instructions: {
textAlign: 'center',
color: '#333333',
marginBottom: 5,
},
flowRight: {
flexDirection: 'row',
alignItems: 'center',
alignSelf: 'stretch'
},
});
AppRegistry.registerComponent('MZRNTutorial', () => MZRNTutorial);

MZButton.js

1
2
3
4
5
6
7
8
9
10
11
12
13
14
15
16
17
18
19
20
21
22
23
24
25
26
27
28
29
30
31
32
33
34
35
36
37
38
39
40
41
42
43
44
45
46
47
48
49
50
51
52
53
54
55
import React, { Component } from 'react';
import {
StyleSheet,
Text,
View,
Platform,
TouchableOpacity
} from 'react-native';
//-----------------------------------------------------
//外部使用该模块, ES6需要使用关键字 export default
//-----------------------------------------------------
export default class MZButton extends Component
{
constructor(props)
{
super(props);
this.state = {status:1};
}
costumPressHandler = () => {
alert('当前状态:' + this.state.status);
const {dianjishijian} = this.props;
dianjishijian();
};
// 使用属性值设置背景颜色
// style={[styles.button], {backgroundColor:this.props.beijingyanse}}
render() {
//解构
const {text, bgColor} = this.props;
return (
<TouchableOpacity
style={[styles.button], {backgroundColor:bgColor}}
onPress = {this.costumPressHandler}
>
<Text style={styles.buttonText}>
{/* 使用属性值 */}
{this.props.text}
</Text>
</TouchableOpacity>
)
}
}
const styles = StyleSheet.create({
button: {
height: 40,
width: 150,
borderRadius: 20,
justifyContent: 'center',
backgroundColor: 'green',
overflow: 'hidden'
},
buttonText: {
textAlign: 'center',
color: 'white'
}
});

IDSRNPlatformUtil.js

1
2
3
4
5
6
7
8
9
10
11
12
13
14
15
16
17
18
import React, { Component } from 'react';
import {
Platform
} from 'react-native';
export function getPlatformString()
{
console.log(Platform.OS);

return Platform.OS;
}
export function isIOS()
{
return Platform.OS === 'ios';
}
export function isAndroid()
{
return Platform.OS == 'android';
}

iOS 项目: 打造本地 pod 库

发表于 2016-09-25 | 分类于 iOS |

本篇的姊妹篇 Cocoapods 管理开源项目 已准备完毕,直戳 链接 即可达到。

Cocoapods 管理代码的必要性

项目到了一定规模, 代码组织和结构显得尤为重要.

重构项目结构,可以从分离代码开始,代码分离,可以把常用稳定的组件封装抽离出来.

分离代码, 常用的有几种方式:

  1. 放到不同的文件夹, 管理和组织代码.
  2. 使用 framework 的方式, 提供给项目使用.
  3. 工具管理如 Cocoapods.

这几种方式, 各有所长, 各有优劣, 无所谓好与坏, 根据自己的项目特点来组织即可.

我的做法是使用 cocoapods 来管理.

下面进入今天的主题:

使用 cocoapods 管理自己的本地代码.

博客 Mac OSX 10.11.1+ 安装 Cocoapods
介绍了如何在最新版 MacOS 中安装 Cocoapods 以及注意事项, 并且作者保证持续「更新, 更正」内容.

创建工程

使用 Xcode 创建一个工程, 工程名就起为 TestPods 吧.

工程目录可以防止在桌面或者你喜欢的目录下面都可以.

在 TestPods 下面创建 LocalLib 目录, 用来放置分离的代码.当然, 你也可以将 LocalLib 这个目录放到其他目录.

在 LocalLib 下面, 我的 pod 库代码名称为 download.

可以新建这个目录.

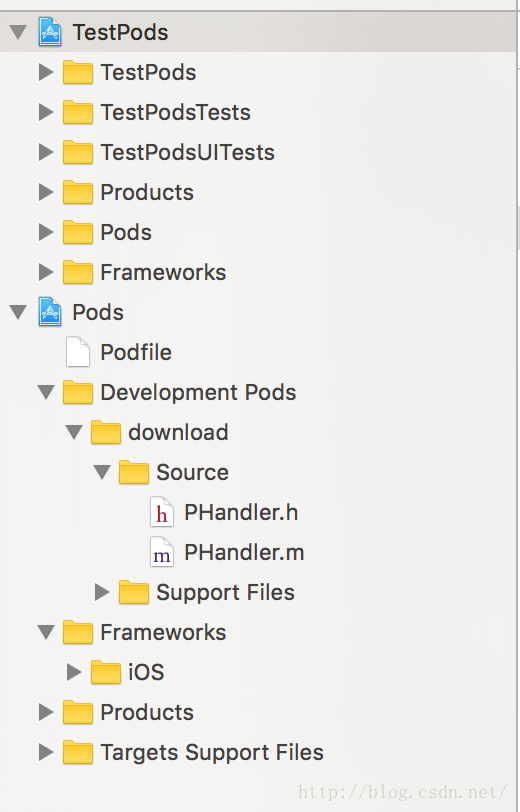
目录如下:
1

创建 podspec 文件

在 download 目录下面, 创建 podspec 文件

1
pod spec create download

创建完成后, 会生成 download.podspec 文件.

具体内容, 创建后, 大家可以自行查看.

修改 podspec 文件

修改 download.podspec, 主要修改几个关键地方:

源码位置
源码版本

1
2
3
4
5
6
7
8
9
10
11
12
13
14
15
――― Source Location ―――――――――――――――――――――――――――――――――――――――――――――#
#
# Specify the location from where the source should be retrieved.
# Supports git, hg, bzr, svn and HTTP.
#
s.source = { :git => "", :tag => "0.0.1" }
# ――― Source Code ――――――――――――――――――――――――――――――――――――――――――――#
#
# CocoaPods is smart about how it includes source code. For source files
# giving a folder will include any swift, h, m, mm, c & cpp files.
# For header files it will include any header in the folder.
# Not including the public_header_files will make all headers public.
#
s.source_files = "Source", "Source/**/*.{h,m}"
s.exclude_files = "Source/Exclude"

另外, 配置好相关描述信息, 不要包含 ‘Example’ 的字样, 不然, 新版的 Cocoapods 执行 pod install 时候, 会报出警告和错误.

这样, 工程可以使用 pods 库了.

工程使用 pod 库

将 TestPods 改为 cocoapods 项目.

在 TestPods 目录, 执行

1
pod init

会生成 Podfile 等文件.

修改 Podfile 文件

1
2
3
4
5
6
7
8
9
10
11
12
# Uncomment this line to define a global platform for your project
# platform :ios, '7.0'
# Uncomment this line if you're using Swift
# use_frameworks!
target 'TestPods' do
pod 'download', :path => './LocalLib/download/'
#pod 'core_lib_spec', :svn => 'http://svn.ids111.com/o2o/client/ios/trunks/master/Frameworks/CoreLibrary'
end
target 'TestPodsTests' do
end
target 'TestPodsUITests' do
end

关键是指明 pod 库的位置.
路径一定要正确.否则无法找到该库.

1
pod 'download', :path => './LocalLib/download/'

在 TestPods 下面, pod install 即可.

如果, pod install 报错, 一般都是你的 pod 库的配置文件(.podspec)里面写的不符合要求.

根据报错信息, 加以修改即可.

xcode 打开工程.
1

示例下载

工程示例代码, 可以 戳这里下载 玩耍!


扫码关注,你我就各多一个朋友~

RN: 如何启动 local server

发表于 2016-09-22 | 分类于 ReactNative |

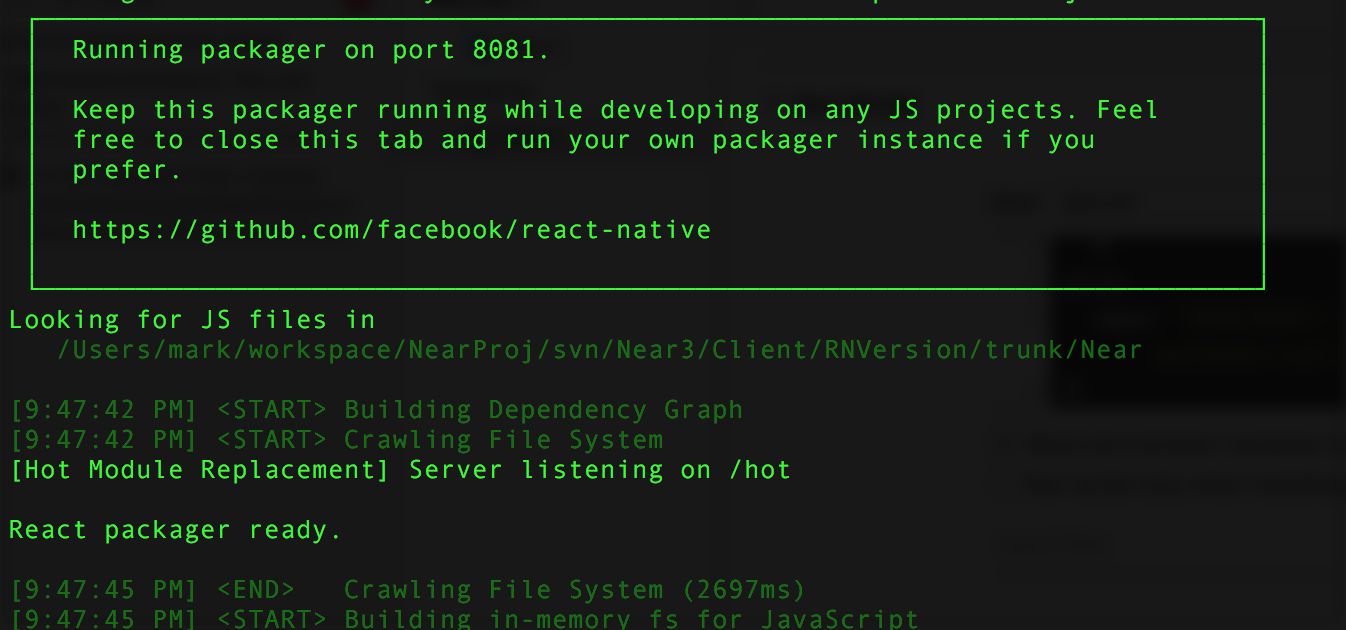
使用 react-native init 创建的工程, 在 xcode 中运行会自动启动一个 RN 的本地 Server.

像下面图片展示这样:
1

那么, 这里问题来了.

比如, 我想暂时不启动这个本地 Server, 那么如何关闭呢?

下面跟大家一起探讨和追究一下.

找到启动的根源

启动这个终端的是在一个 React.xcodeproj 工程的 「Build Phases」中脚本里面配置的.

脚本内容如下:

1
2
3
4
5
6
7
8
if nc -w 5 -z localhost 8081 ; then
if ! curl -s "http://localhost:8081/status" | grep -q "packager-status:running" ; then
echo "Port 8081 already in use, packager is either not running or not running correctly"
exit 2
fi
else
open "$SRCROOT/../packager/launchPackager.command" || echo "Can't start packager automatically"
fi

真正起作用的是:

1
open "$SRCROOT/../packager/launchPackager.command"

解决方案

这样我们就可以关闭这个自启动了, 示例代码如下:

1
2
3
4
5
6
7
8
9
if nc -w 5 -z localhost 8081 ; then
if ! curl -s "http://localhost:8081/status" | grep -q "packager-status:running" ; then
echo "Port 8081 already in use, packager is either not running or not running correctly"
exit 2
fi
else
#open "$SRCROOT/../packager/launchPackager.command" || echo "Can't start packager automatically"
echo "Nothing..."
fi

看看 launchPackager.command

这个文件在「node_modules/react-native/packager/」下面.

该文件是启动另外一个脚本 packager.sh, 核心代码:

1
source ./packager.sh

最终执行:

1
node "$THIS_DIR/../local-cli/cli.js" start "$@"

大家有兴趣可以去看看源码, 一探究竟.

RN: 创建iOS工程代码的indent问题

发表于 2016-09-19 | 分类于 ReactNative |

起因

使用最新版RN(0.33)来创建工程, 大家可以发现, OC 代码的退格变成了两个空格.
如下:

1
2
3
4
5
6
7
8
9
10
11
12
13
14
15
16
- (BOOL)application:(UIApplication *)application didFinishLaunchingWithOptions:(NSDictionary *)launchOptions
{
NSURL *jsCodeLocation;
jsCodeLocation = [[RCTBundleURLProvider sharedSettings] jsBundleURLForBundleRoot:@"index.ios" fallbackResource:nil];
RCTRootView *rootView = [[RCTRootView alloc] initWithBundleURL:jsCodeLocation
moduleName:@"Mark"
initialProperties:nil
launchOptions:launchOptions];
rootView.backgroundColor = [[UIColor alloc] initWithRed:1.0f green:1.0f blue:1.0f alpha:1];
self.window = [[UIWindow alloc] initWithFrame:[UIScreen mainScreen].bounds];
UIViewController *rootViewController = [UIViewController new];
rootViewController.view = rootView;
self.window.rootViewController = rootViewController;
[self.window makeKeyAndVisible];
return YES;
}

无论你回车或者 tab 或者格式化(右键/Structure/Re-Indent)代码, 会发现, 都是这种调调.

面对这突如其来的变化, 我开始觉得有点淡淡的忧伤.

对于一直使用 tab width = 4 的我来说, 无法忍受. 必须改过来.

思考

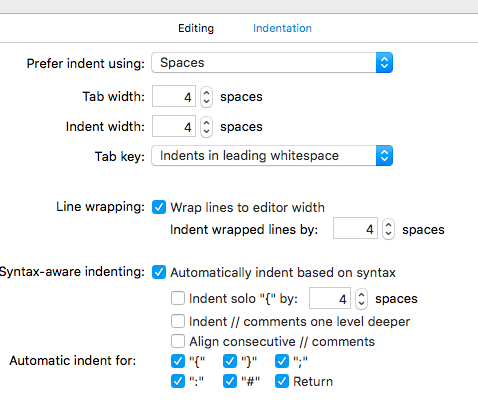
打开 Xcode 的 preferences, 看到其『设置』正常的不要不要的.

所以可以断定不是 Xcode 的问题.

1

因为升级了 Xcode 到最新版 Xcode8, 还以为是 Xcode8 的 bug, 打开之前的 React Native 工程或者其他 Xcode 工程, 就没有这个「蛋疼」的问题.

最终猜想是工程配置文件引起的…

解决

既然和 Xcode 没有关系, 那么问题就一定出现在配置文件上面.

罪魁祸首 project.pbxproj

1
2
3
indentWidth = 2;
sourceTree = "<group>";
tabWidth = 2;

修改为:

1
2
3
indentWidth = 4;
sourceTree = "<group>";
tabWidth = 4;

或者直接删除:

1
2
indentWidth = 2;
tabWidth = 2;

关闭工程, 重启 Xcode 就可以了.

<1…181920>

193 日志
16 分类
163 标签
© 2024 veryitman